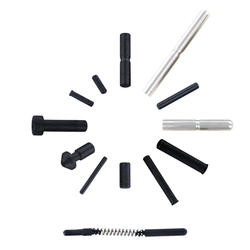
Ejector Pin Drill Bit for 1911/2011, by Dawson Precision®

(13 reviews)
Write A Review
Perfect Impact Guarantee
$7.99

Combination currently unavailable - please choose a different selection.

Adding to cart… The item has been added

Description

Watch our video on how to work smarter, not harder!

Our Ejector Pin Drill Bit uses it’s counter clockwise cutting edge to keep the ejector pulled tight into the frame during the drilling process. Using a standard drill bit will push the ejector up and away from the frame during drilling causing a loose fit.

  • FASTEST and EASIEST way to fit an ejector to a frame.
  • 0.06250" FOR USE WITH 1911 frames.
  • 0.09375" FOR USE WITH 2011® frames.

If you’ve ever installed an ejector onto a 1911 or 2011® frame you know it’s a pain in the butt. First, you have to install the ejector into the frame. Then, you have to stick a sharp object into the ejector pin hole and mark the spot on the ejector. Next, you have to take out the ejector and file that spot with a needle file. Put the ejector back in and check the pin's fit. Repeat again and again until the pin fits. It’s a pain in the butt and hard to get a perfect fit. But now, there’s a simple, easy way that you’re gonna love!

  1. Using our Ejector Pin Drill Bit, just install the ejector into the frame.
  2. Chuck the drill bit into your hand held reversible drill and (very carefully) with very little force, let the drill bit do the work and drill through the ejector pin hole from the RIGHT side of the frame with the drill SET TO REVERSE.

This allows the ejector pin hole to act as a drill guide. Now the cutting edge only contacts the post on the ejector and since its rotating counter clockwise it actually pulls the ejector tight into the frame.

cali-warning.jpg

Reviews

Hide Reviews Show Reviews
  • 5
    Ejector Pin Drill Bit

    Posted by Mick Nelson on Aug 17th 2024

    Dave once told he is a genius, and I've never doubted him! He got me to buy over 30 of the 2011 Tool-less base pads! They're great! I bought this bit to install ejectors, and Dave has done it again! It was very easy and worked well! Thanks Dave!

  • 5
    Ejector pin drill bit

    Posted by MJP on Dec 15th 2022

    Used the 1911 ejector drill bit to install a Wilson Combat ejector on a Springfield Armory Operator 1911. Worked perfectly. Highly recommend this method.

  • 5
    Perfect

    Posted by RichS on Jun 25th 2018

    Worked perfectly.

  • 5
    Great Tooling.

    Posted by Israel on Apr 16th 2018

    Dawson Precision is the place to go for hard to find tools. I specially like your videos on How to do the job the best way . I’m staying here with Dawson. Dawson Precision is top notch.

  • 5
    5 Stars

    Posted by Robert Ward on Jan 29th 2018

    Quick accurate job. Helps make by 1911 rebuild a snap. Good work Dawson Precision.

  • 5
    Phenomenal

    Posted by Greg on Dec 18th 2017

    Used this drill bit for a new Ejector. It was without a doubt an Exceptional cut and quality bit. absolutely zero issue. watch the how to Video and followed direction. Vary easy to use.

  • 5
    Wish I had found these sooner

    Posted by Hugh on Oct 19th 2017

    I read about the idea of using a left-hand twist bit online. So I tried it with an import bought from Amazon. That pistol now has a cheap Chinese drill bit serving as the ejector pin since it broke off just as it broke through drilling the pin leg. When it comes loose, and it will, I will drill it out with a carbide drill, ream the hole to 3/32 and use an STI pin. All this is to say, use a good quality Dawson bit in the first place and save yourself the PITA.

  • 5
    Works like a charm!

    Posted by Mark on Jul 20th 2017

    Easy to use. Great results. Glad I bought this drill bit.

  • 5
    Works as described - Great for DIY build

    Posted by JMc on Jan 28th 2016

    Created a perfect fit in just one pass with this bit. Left hand twist worked like a charm to pull down on the ejector. No removing ejector multiple times and using a file to get the right fit. From set up to finish took me less than 3 minutes. Great IDEA!

Videos

Videos Hide Videos Show Videos