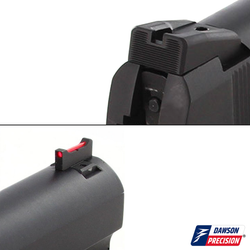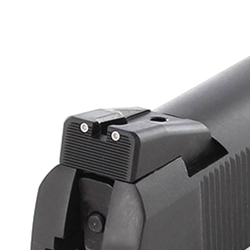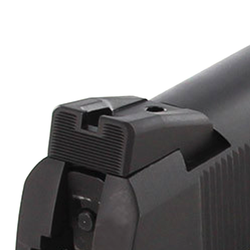
Good sights. Instructions need work.
Sig (GSG) 1911-22 Pistol: upgrading to Dawson Precision steel sights (Serrated black rear sight; serrated, fiber optic front sight). General: The 1911-22 slide is made of aluminum-zinc alloy. Because this is softer than a steel set screw, the rear sight comes with a small plate that receives the steel set screw and distributes the force over a larger area. The two set screws on the front sight should be snugged up, not tightened excessively. Also, the aluminum-zinc alloy necessitates that the new sights should be fitted so that they can go in half way by hand before driving them into place. Both sights are slightly oversized and need to be fitted to the dovetail (that’s a good thing). Always modify the cheaper sight instead of the expensive slide. Notice that the kit comes with a square aluminum punch for the front sight. Put a piece of electrical tape at the end to avoid marring the floor of the slide’s dovetail. The round, nylon-tipped aluminum punch is for the rear sight. Rear sight: 1. Loosen the set screw and tap out the factory plastic rear sight with the nylon-tipped punch. 2. Fit the new sight so that it can go halfway in by hand. Use a triangular file to stroke the rear edge of the sight dovetail about 10 strokes. Test the fit. Repeat until the sight can go halfway in by hand. Note that sights usually, but not always, go in best left-to-right. 3. With alcohol clean the slide, sight, and the small metal disk that spreads the force of the set screw over a wider area. 4. Spread a drop of blue thread locker on the slide dovetail. Dawson Precision recommends red thread locker, but that takes 300 degrees of heat to break it if you need to later—your choice. 5. Insert the new sight (with set screw plate) into the slide halfway by hand and use the nylon-tipped aluminum punch to tap until the sight is centered. Use medium force taps. 6. Tighten the set screw with moderation. 7. Wait 24 hours for the thread locker to set. Front sight: 1. Loosen the set screw and drive the old sight out with the square aluminum punch. 2. Note that the rear of the front sight is serrated to reduce glare. 3. Also note that there is an arrow on the bottom of the sight that denotes the direction of insertion (L to R). This arrow will become more obvious when you sand the bottom. 4. Fit the new sight so that it can go halfway in by hand.. Sand off the bottom by rubbing it on a sheet of 100 grit abrasive paper laid flat on the table. Use about 10-20 strokes up and down the paper. Test to see if you can push the sight in halfway by hand. Repeat until you can. It may take 200 strokes. (Note that the geometry of the rear sight and its relation with the slide made sanding the bottom a poor choice.) 5. Clean the sight and slide with alcohol. 6. Spread a drop of blue thread locker bottom of the new sight. Dawson Precision recommends red thread locker, but that takes 300 degrees of heat to break it if you need to—your choice. 7. Press the sight in halfway by hand and use the square aluminum punch tap until the sight is centered. Use medium force taps. 8. Moderately tighten the two set screws. 9. Wait 24 hours for the thread locker to set.